Acquiring OAuth tokens with the Implicit Flow

Calls to Fortellis APIs need to be authenticated. To access anything other than test data, you will need to supply an OAuth access token.
OAuth tokens can be acquired through various different flows, depending on the use case. This post will demonstrate the implicit flow, which is intended for use by apps who don't have any means of protecting their client secret. In practice, this usually means single page web apps (i.e. apps with no backend server) and native iOS or Android apps. In all these cases, the source code is discoverable by the user so any included secret would be vulnerable. For this example, we will create and deploy a single page react app.
Create an App in Fortellis
To make a call to a Fortellis API, you need an app, so head over to developer.fortellis.io, create an account and log in. Then select "My App", then "Register an Applicaton".
I'm going to create a simple app that finds the vehicles for sale at a dealership. My completed form looks like this:
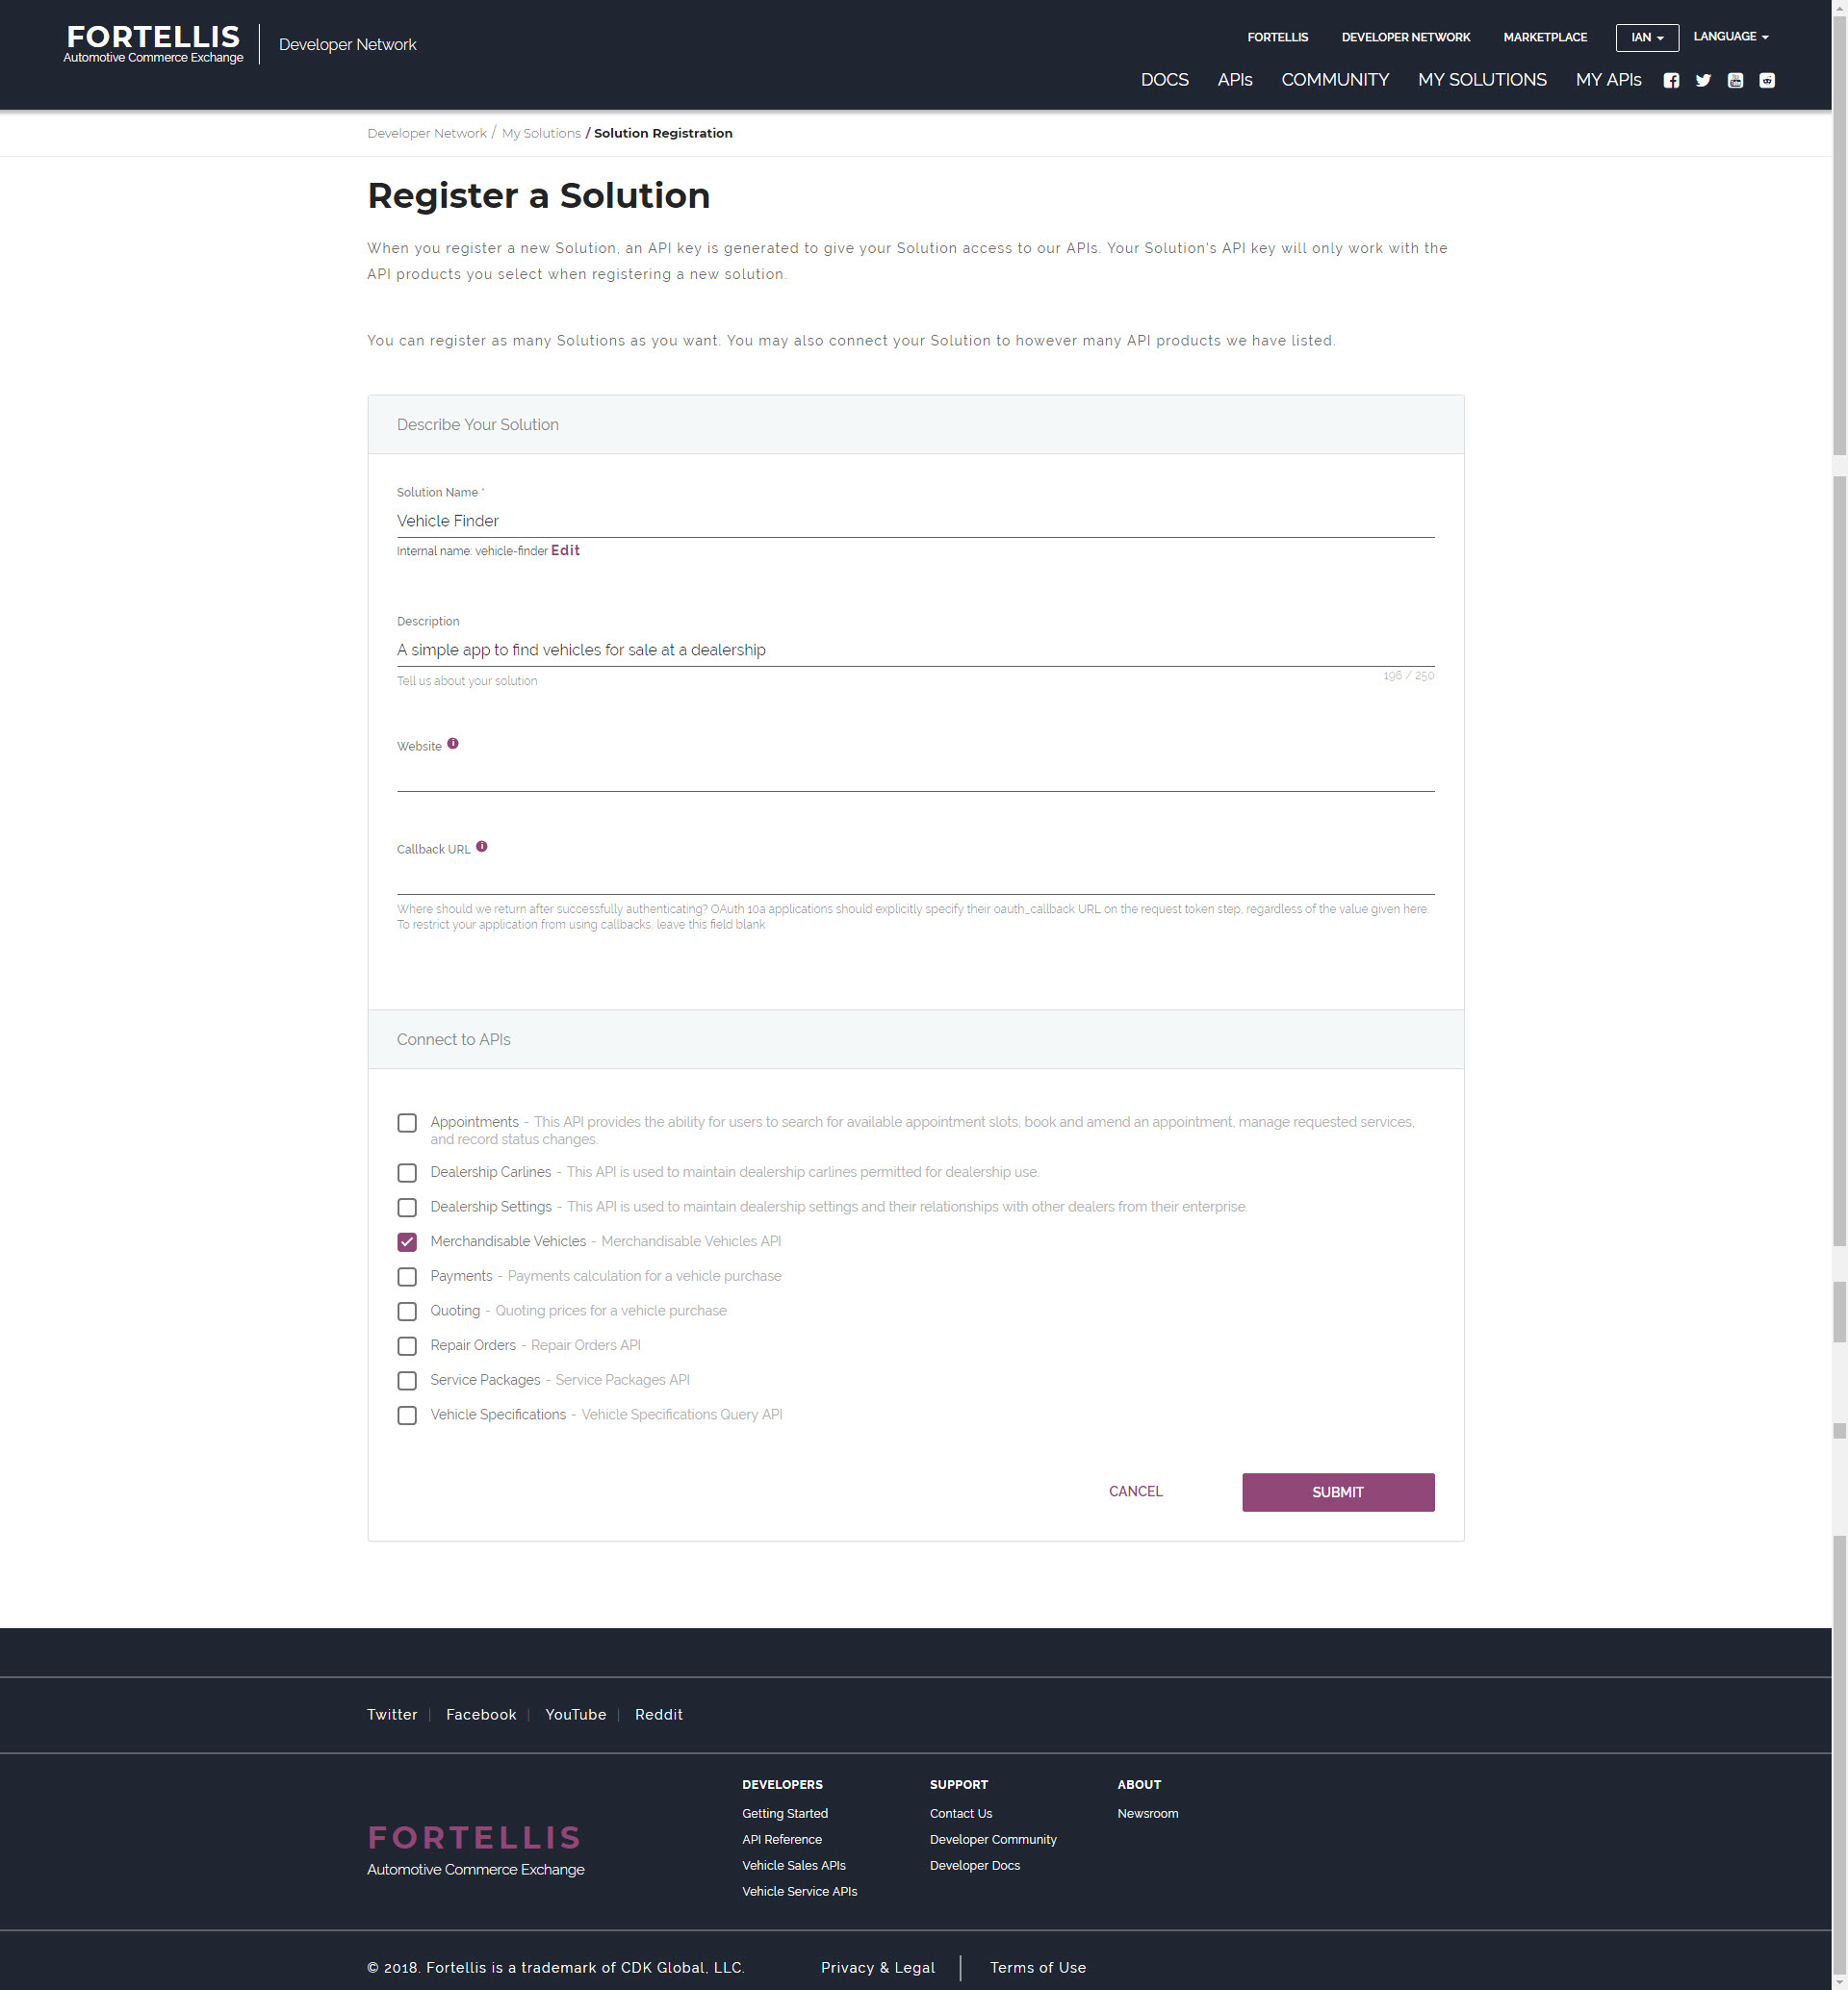
Leave the Website and Callback URL fields blank for now; we will come back and fill them in later.
You must connect your app to any APIs that you want to make use of. I'm going to need the Merchandisable Vehicles API so I'm going to select that one. You can pick as many APIs as your app needs.
Once you're done, click submit and you should see your new app, including its API Key and Secret:
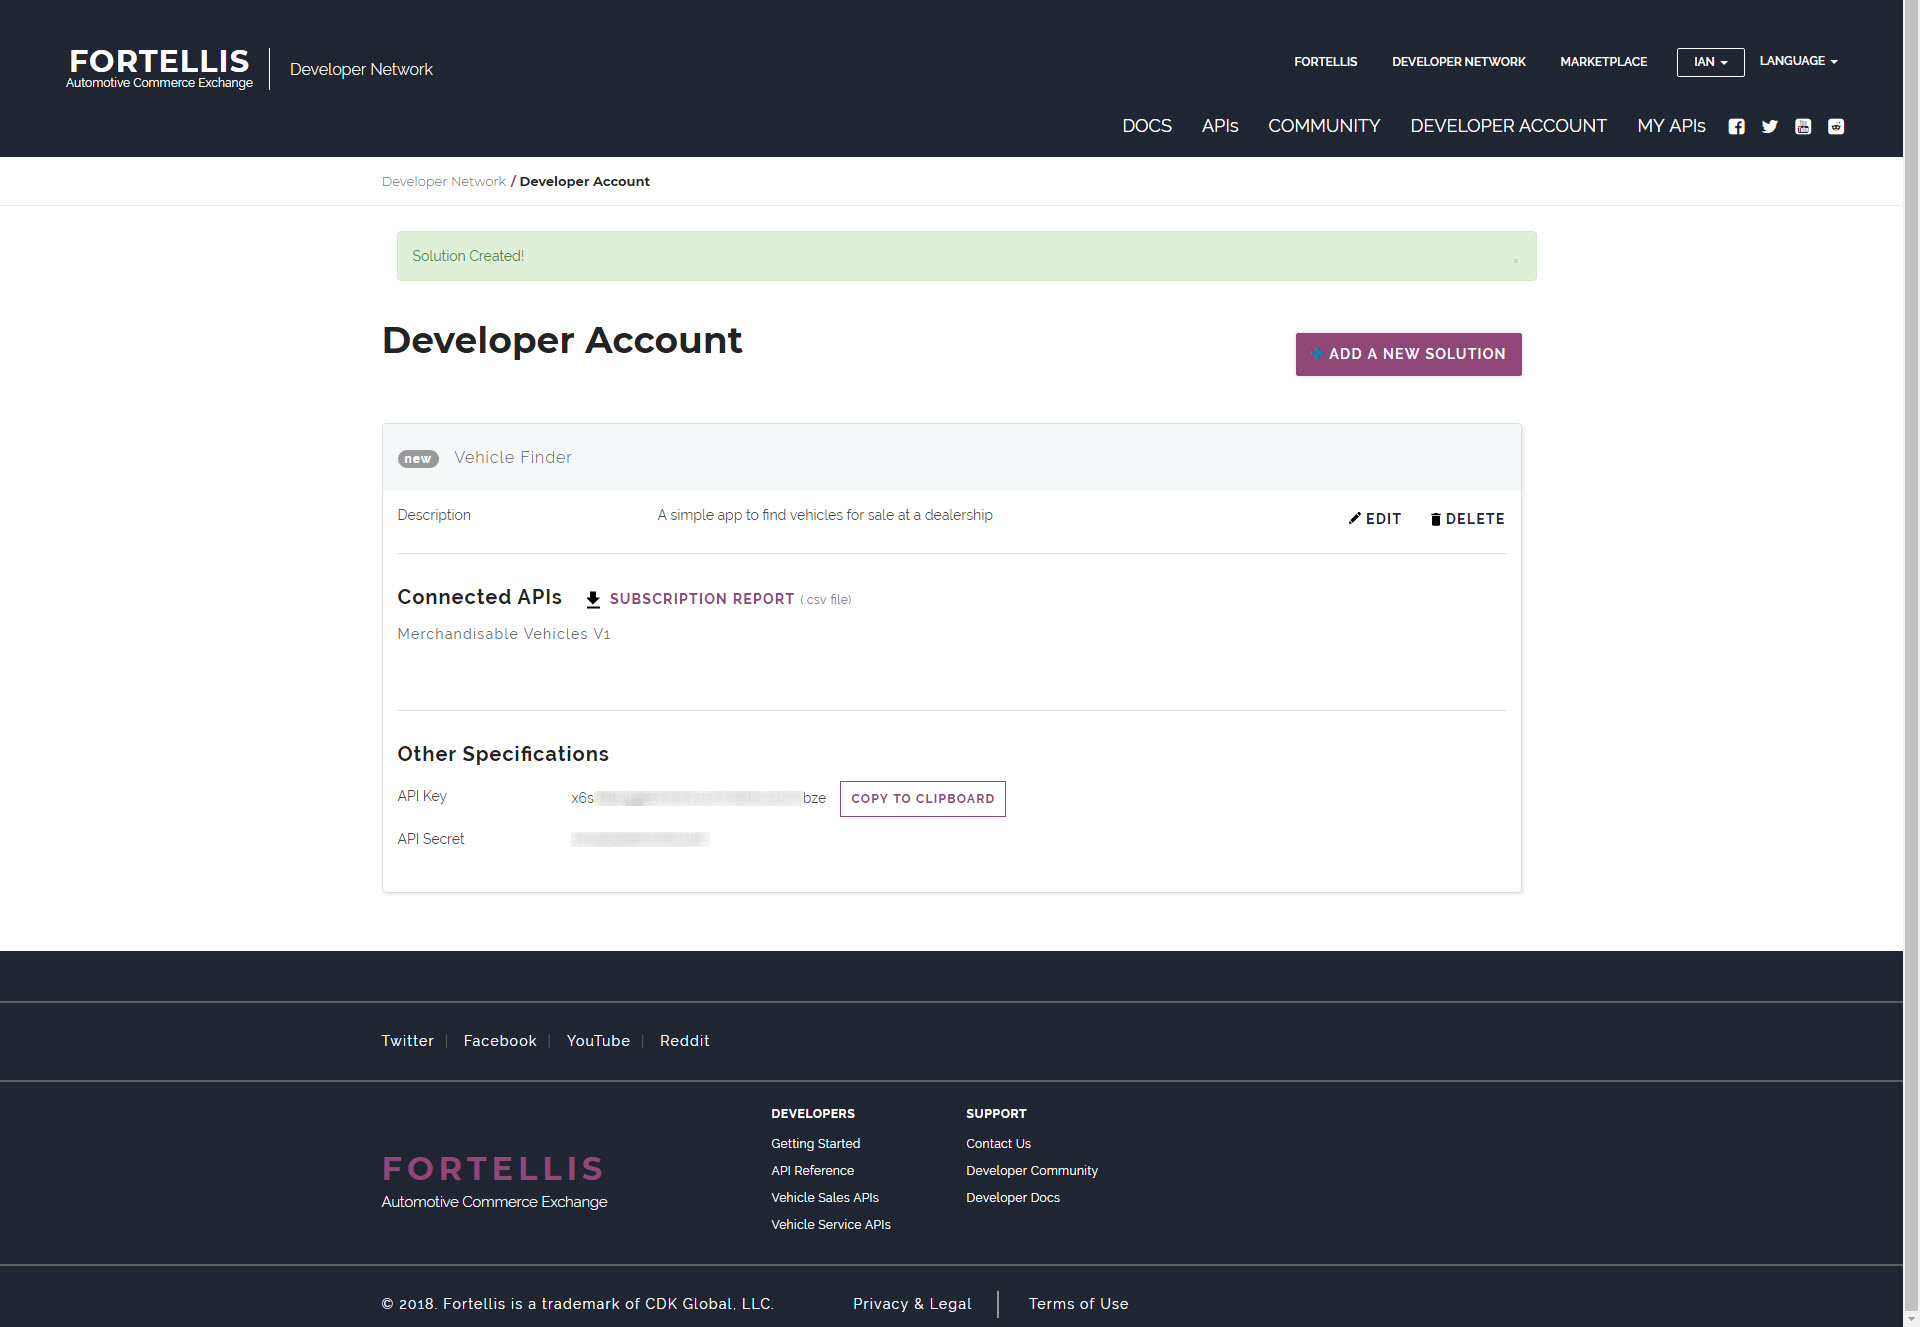
The API Key here represents the client_id that will be used in the OAuth flow.
Prepare for deployment
Note: - Depending on your usage, hosting an app through Amazon S3 can incur charges. Make sure you understand and accept Amazon's charging model before using it.
There are plenty of options available to deploy a react app and make it available to the world. I will be using Amazon S3, whose storage buckets can be configured to host websites. If you don't already have an AWS account, create one, then pick S3 from the services menu and select "Create Bucket"
Give your bucket a name (this must be unique across the whole of AWS) and pick a region to host it in. AWS Region selection is out of scope for this article so pick anything for now. The nearest one to you geographically is likely a sensible choice.

Click next and you'll get a page of different things you can configure for your new bucket (including versioning, logging, encryption etc). We don't need to worry about any of these for now, so click next again.
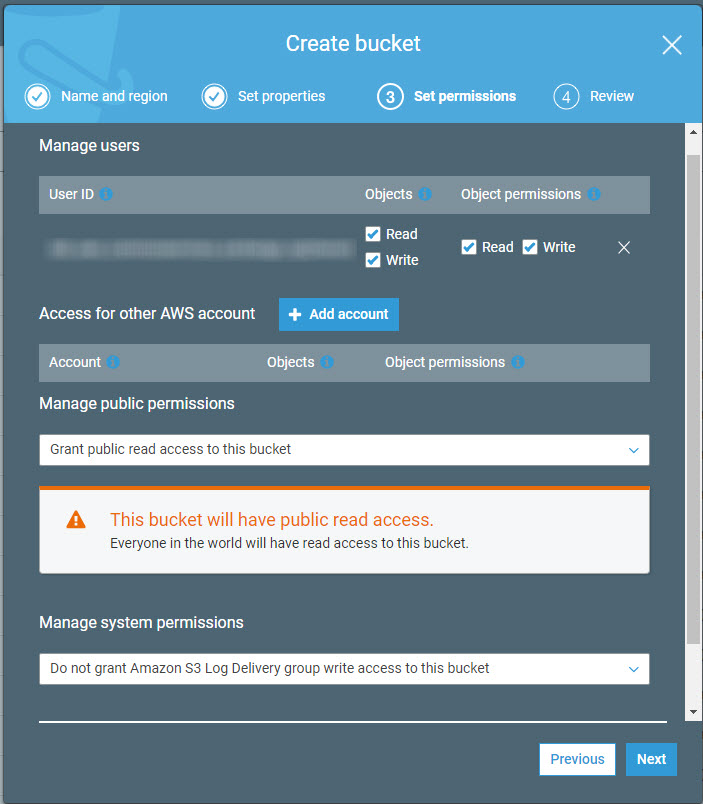
The next screen will allow you to set permissions on your bucket. Since we want our app to have the widest possible audience, we want everyone to have read access to it. I also want to make sure than only I can upload content and make changes to my bucket:
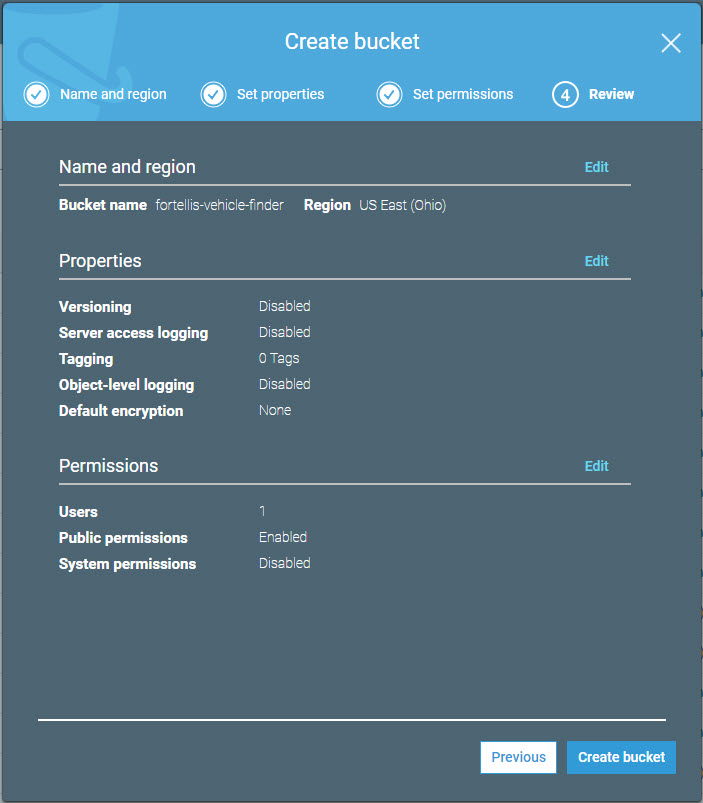
Click next and you'll see a summary of your bucket settings. Mine look like this:
Once you're happy, click "Create Bucket".
To enable users to see the contents of your bucket, go to the "Properties" tab and click on "Static Web Hosting". Select "Use this bucket to host a websit" and you should see something like this:
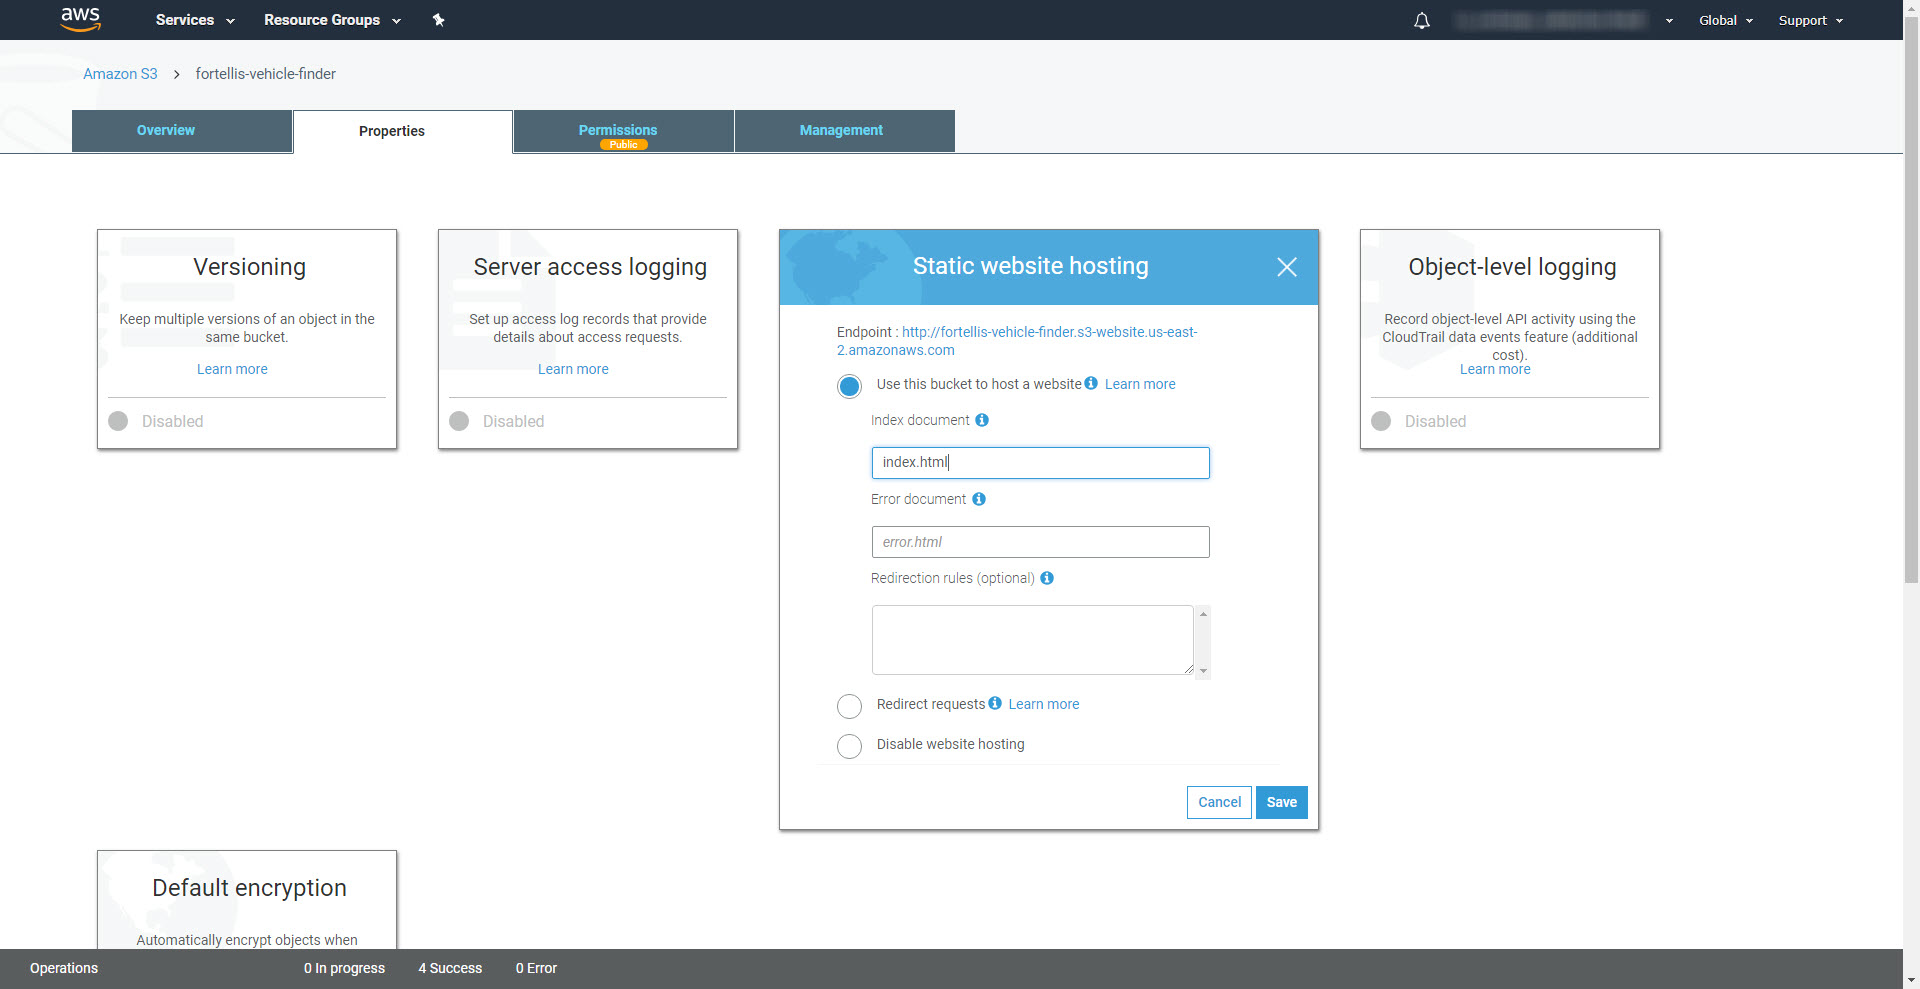
You will need to enter the location of the index document, but the suggested value is correct - our app's index will indeed be called index.html, and will be located in the bucket's root directory. Type it in and click "Save".
The screenshot above shows the URL that S3 will host my app on. Once I've saved the configuration, the bucket is ready to host our app.
Update App Settings
Now we know where users will be accessing our app, we can go and update the parts of the app configuration we left out earlier. Go back to the "My App" page on the Fortellis Developer Network, select your app and click "Edit". You'll see a form similar to the one where you created the app initially. You can now add our S3 URL to both the Website and Callback URL fields. Some apps might use different URLs for these two fields, but my app is so simple I'll use the same one. Click "Save" when you're done.

Download the app code
Get the example project code with:
git clone https://github.com/Fortellis/ImplictFlow-ExampleApp.git
Then do an
npm install
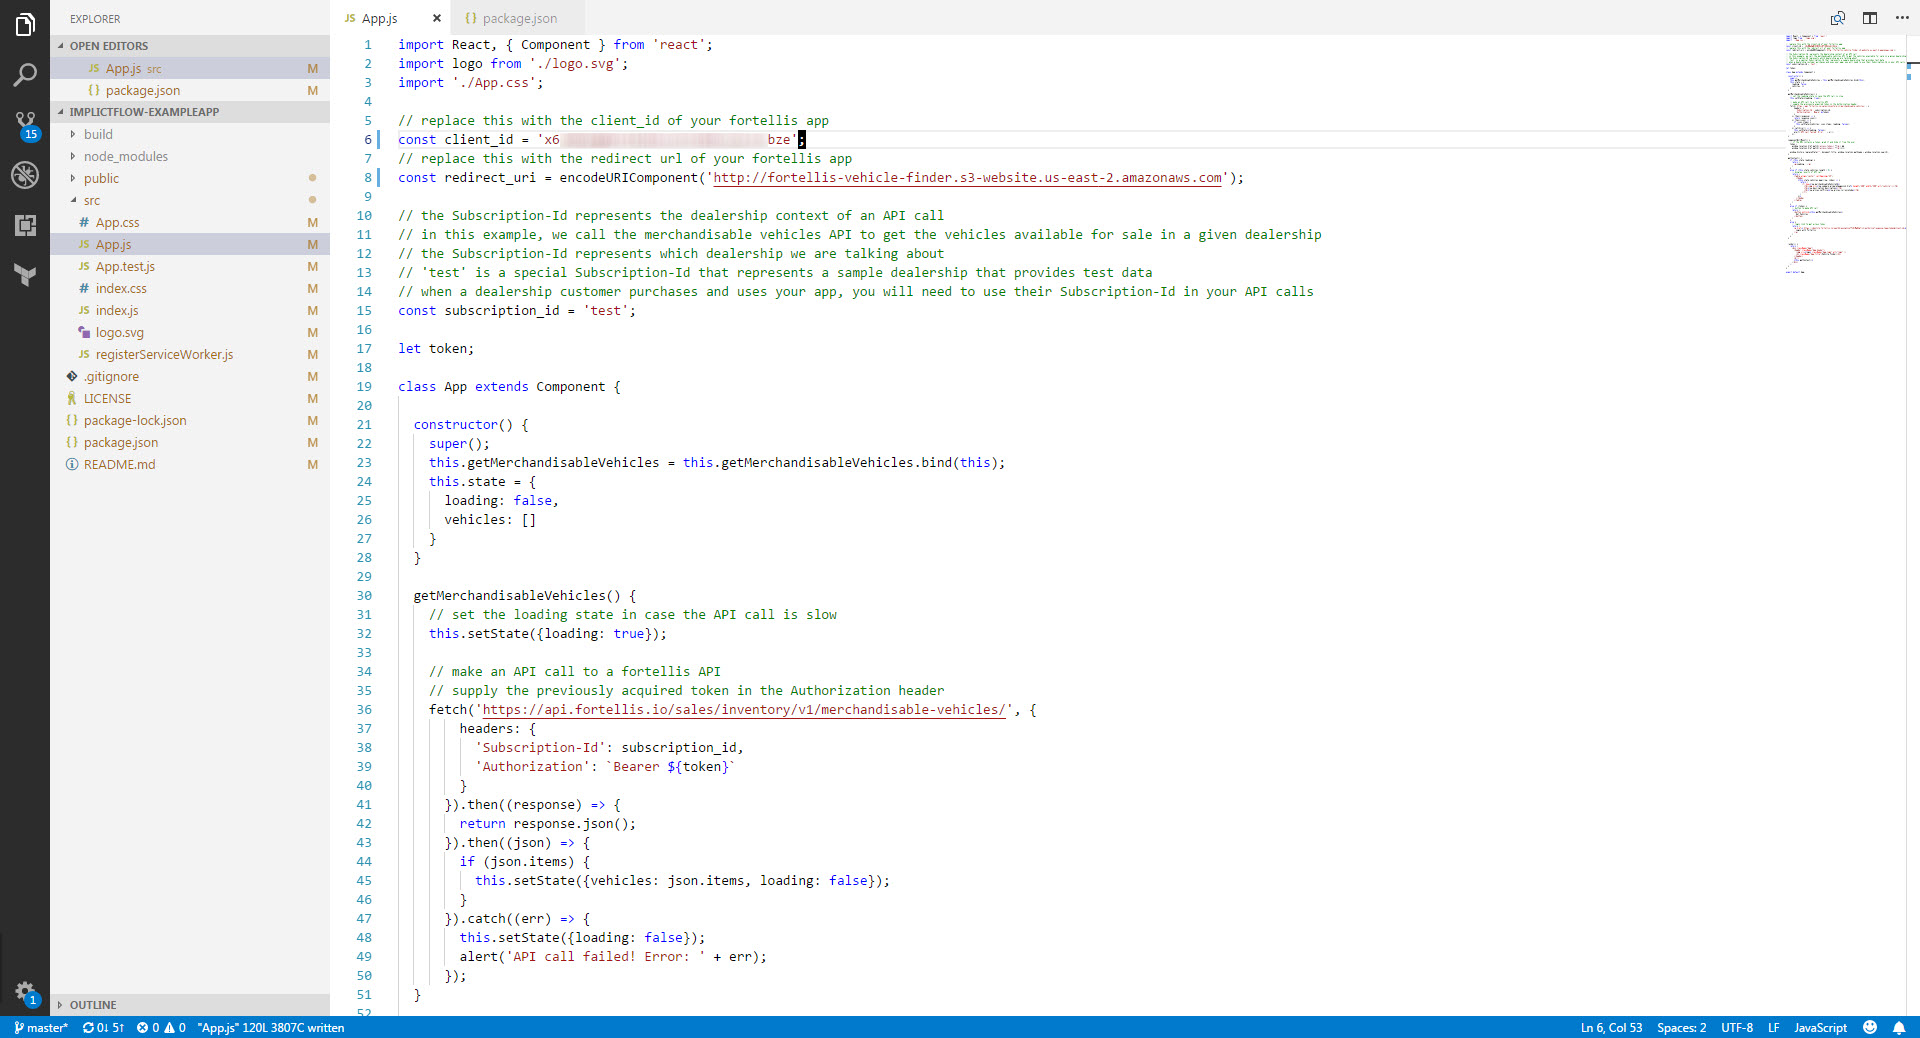
You will then need to make a couple of changes to the app code. Replace the placeholder client ID and redirect URI with the API Key and redirect URI from your Fortellis app. Open src/App.js in your editor and change the client_id and redirect_uri variables:
We already have a bucket ready to host our app, so we're ready to deploy it. Do:
npm run build
This is a standard script provided by create-react-app that will take care of building your app for you. It will create a directory called build, and the files in this directory represent your app and can be uploaded to your S3 bucket as is.
Go back to your bucket and click 'Upload'. Add the contents of your build directory (not the build directory itself):
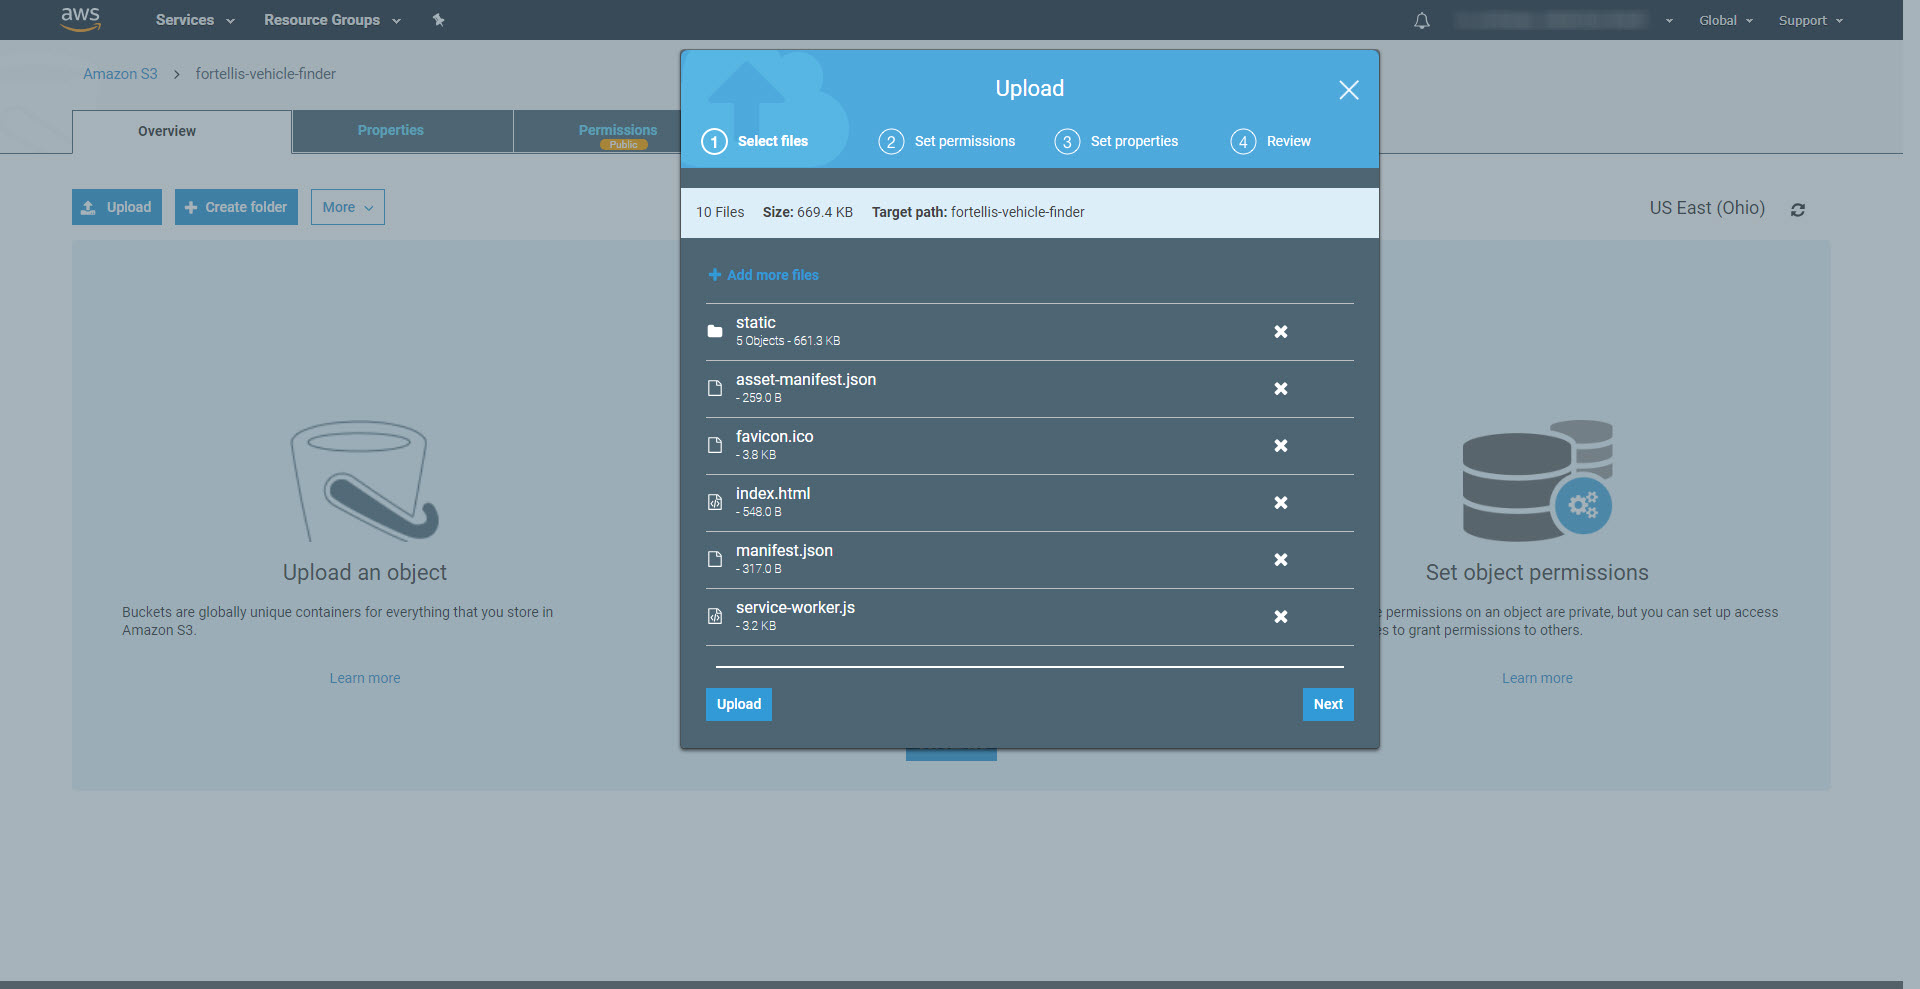
Note- it seems that using the drag and drop will include the static" child directory, but using the "Add Files"'" button will exclude it. You will need the files in there so either use the drag and drop or do things manually so the contents of your bucket exactly matches the content of your project build directory.
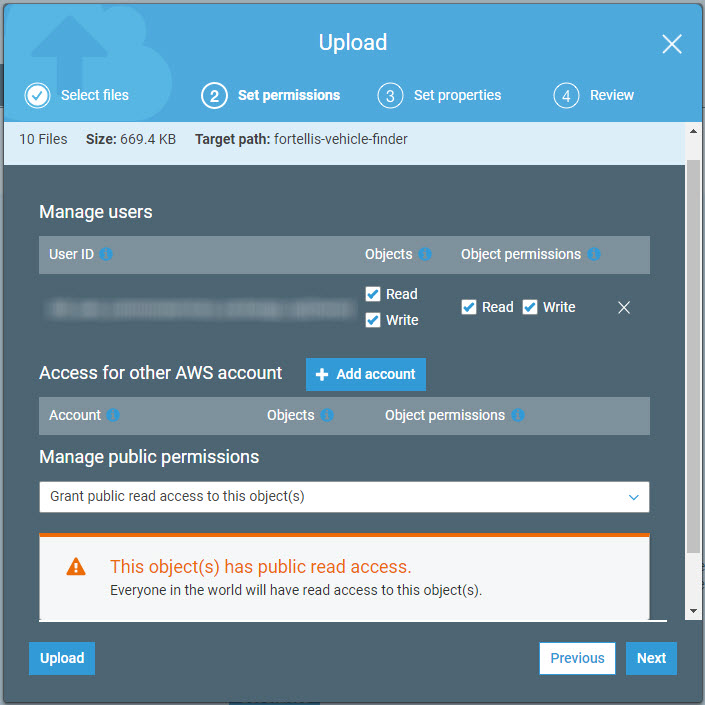
Click next to set the permissions. Again, we will need to give everyone read access to these files:
Click next to see the properties page. None of our files need special properties so click next again to see the review page. Mine looks like this:
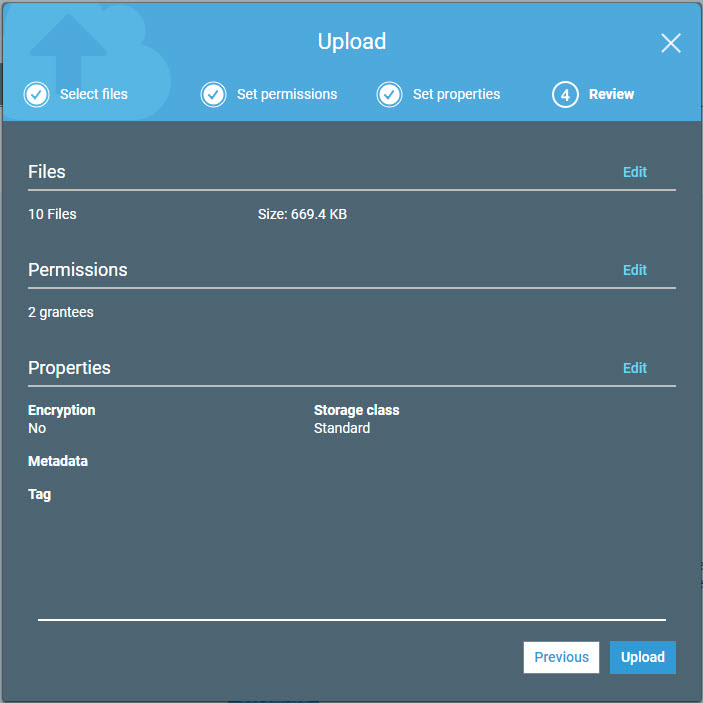
Once you're happy, click "Upload" You should see your bucket populate with the files you have just uploaded.
Finished!
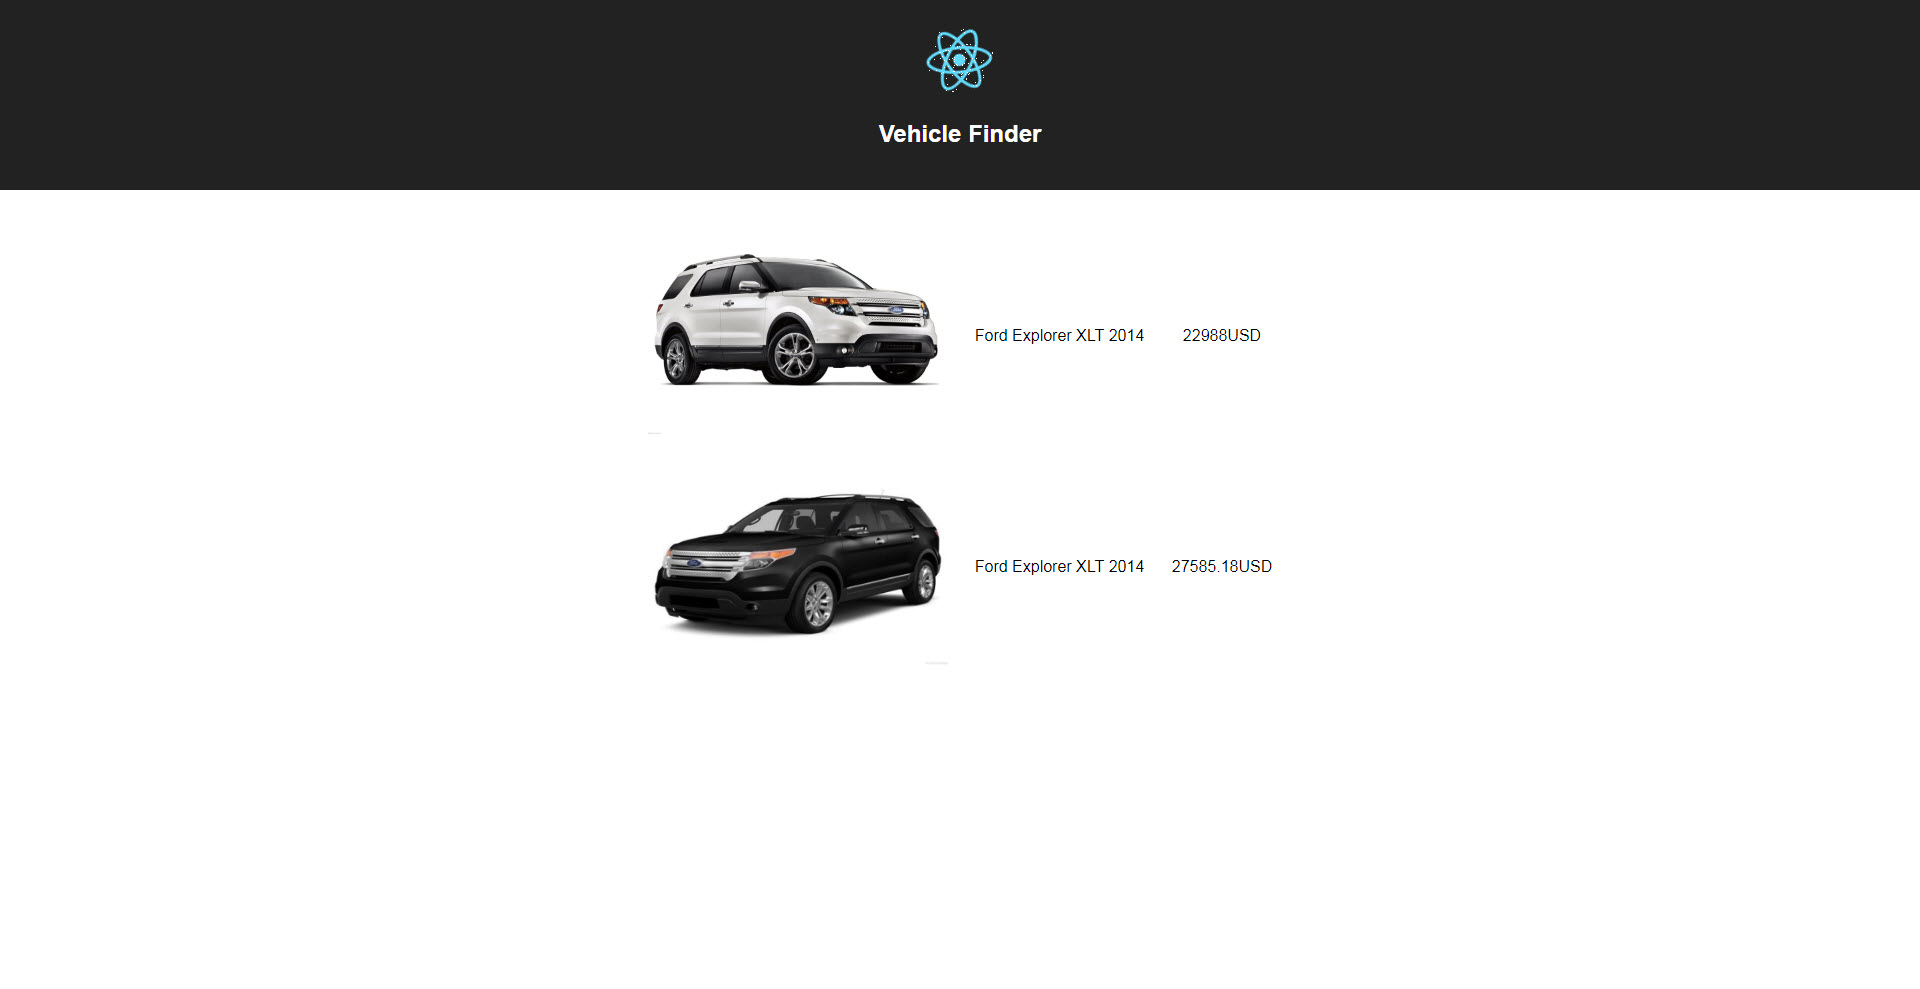
At this point, everything should be working! Navigate your web browser to where S3 is hosting your app and click "Login with Fortellis". You'll be redirected to the Fortellis login page. Once you sign in with your Fortellis credentials, you should be redirected back to the app (specifically the callback URL we set in the app settings) with an access token. The app will grab the access token and hide it from the user. You can then click the "Get Vehicles" button. The app will call the Fortellis API, with the token its just acquired, and display the vehicles that it gets back. It should look something like this:
I hope this article has been useful and helps Fortellis developers get started using the Implicit OAuth flow. If you require any assistance, please make use of theFortellis Developer Community.
Comment
You must be logged in to post a comment.